
You don’t need React or a library to build a smooth quiz.
In this tutorial you’ll build a simple interactive quiz app with plain JavaScript, three files, basic JS knowledge, and about an hour.
The app will ask questions, let users pick answers, track score, and show results.
Along the way you’ll practice DOM manipulation (updating the page), event listeners (responding to clicks), and simple logic for scoring.
By the end you’ll have a working quiz you can expand and reuse in other projects.
What You Need to Build a Simple Interactive Quiz App With JavaScript
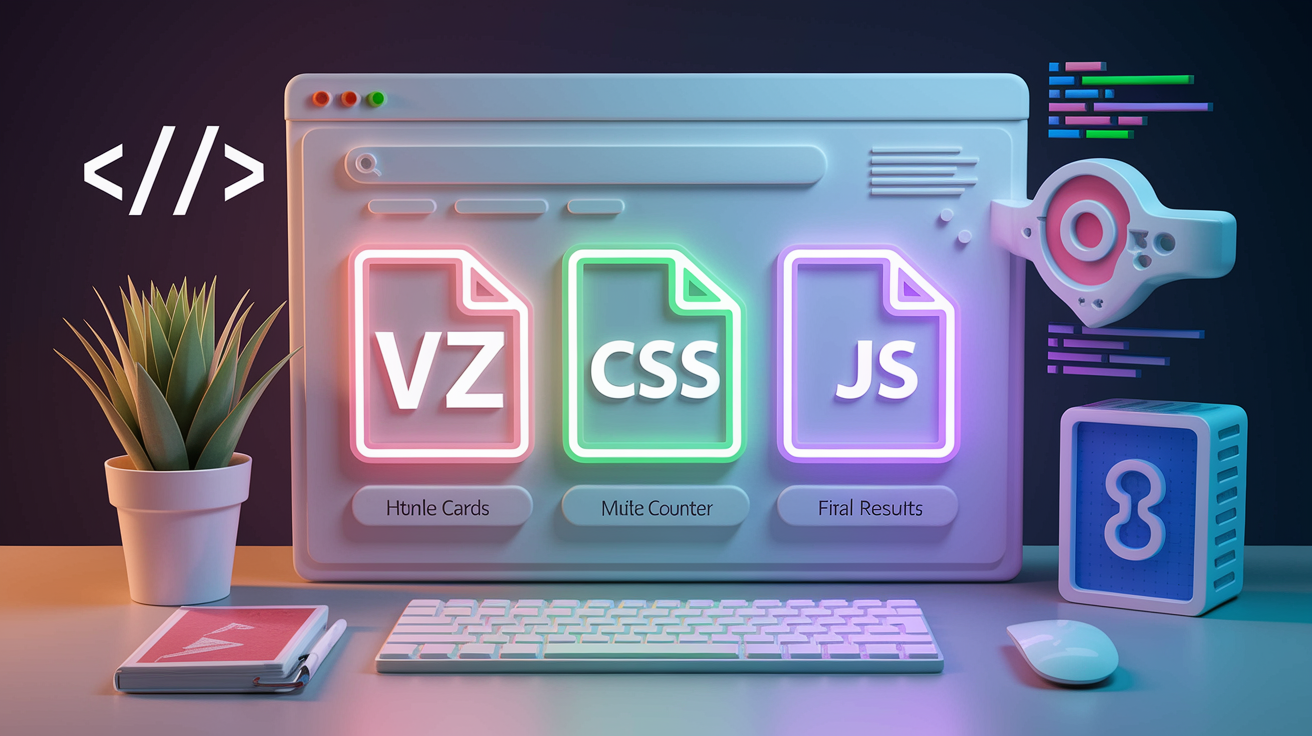
You need three files, some basic JavaScript knowledge, and about an hour to build your first working quiz app. The app will ask questions, let users pick answers, track score, and show results at the end. You’ll write HTML for structure, CSS for styling, and JavaScript for all the logic that makes the quiz actually work.
You’ll store quiz questions as an array of objects inside your JavaScript file. Each object holds one question, a list of choices, and the index of the correct answer. When a user clicks a choice, an event listener fires and the app checks if the answer is right, updates the score, and moves to the next question. After the last question, the quiz displays the final score by replacing the question area with a results screen.
The whole project uses plain JavaScript. No frameworks. You can see exactly how DOM manipulation, event handling, and conditional logic come together. You’ll practice selecting elements by ID or class, updating text on the page, and responding to clicks. The code is beginner safe and you can run it in any browser.
Core components you’ll build:
- HTML file with containers for questions, choice buttons, and results
- CSS file to style buttons, set layout, and show correct or incorrect states
- JavaScript file that defines questions, renders them one at a time, and handles scoring
- Event listeners that respond when a user clicks an answer button
- Logic that checks answers, increments score, and decides when to show results
Why Simple JavaScript Quiz Apps Work the Way They Do

Quiz apps rely on a few core JavaScript patterns that make interactive web pages tick. Questions live in an array because arrays let you loop, count, and move forward one item at a time. Each question is an object so you can store multiple pieces of data (question text, choices, correct answer) in one bundle and access them by name. When the app starts, JavaScript grabs elements from the HTML using IDs or classes, then updates their text or CSS as the user moves through the quiz.
Event listeners sit on your choice buttons and wait for clicks. When a click happens, the listener calls a function that compares the user’s pick to the correct index stored in the question object. If the numbers match, score goes up. If currentIndex is less than the total number of questions, the app loads the next question. If currentIndex equals the last question’s index, the app stops showing questions and displays results instead. That conditional check (if currentIndex < questions.length) is the hinge that controls the whole flow.
DOM updates happen every time a new question renders. JavaScript sets the question text, loops through the choice buttons, and assigns each button the correct label. When the user clicks, the app often disables further clicks on that question and adds a CSS class to show which answer was correct or incorrect.
Core mechanisms that power quiz logic:
- Questions stored as objects in an array so you can loop and access properties easily
- DOM manipulation to inject text and update classes whenever the current question changes
- Event listeners on buttons to capture user input without reloading the page
- Scoring variables (like score and currentIndex) that increment and track progress through simple addition and conditionals
Setting Up Your Quiz App Project Files

Create a new folder on your computer and name it something like “quiz app.” Inside that folder, make three files: index.html, styles.css, and script.js. The HTML file holds the structure and links to the other two. The CSS file controls layout, colors, button states, and spacing. The JavaScript file contains your question data and all the functions that make the quiz interactive.
Open index.html and add the basic HTML5 boilerplate. Doctype, html, head, body tags. Inside the head, link your CSS file with a link tag and set the page title to something like “JavaScript Quiz.” At the bottom of the body, link your JavaScript file with a script tag so the DOM is fully loaded before your code runs. Your HTML will include a main container for the quiz, a heading, a paragraph or div for the question text, a group of buttons for choices, a paragraph for feedback, and a container that shows results at the end.
Keep your files organized from the start. Put all three in the same folder so relative paths stay simple. You’ll reference styles.css as “./styles.css” and script.js as “./script.js” without extra folder navigation. If you want to add images or icons later, create a folder called “assets” and update your paths accordingly.
Main files and their roles:
- index.html: defines the quiz container, question display area, choice buttons, and results section
- styles.css: sets button styles, correct or incorrect visual states, responsive layout, and spacing
- script.js: stores questions, tracks current question and score, updates DOM, handles events
- Typical HTML length: 30 to 45 lines including doctype and head tags
- Typical CSS length: 40 to 60 lines covering layout, buttons, and state classes
- Typical JavaScript length: 80 to 120 lines for question data, render logic, event handlers, and result display
Most tutorials end up with a project that’s around 110 to 200 total lines of code across all three files. The whole folder zips to about 12 KB, so you can share it or upload it anywhere without worrying about size.
Building the HTML Foundation for Your JavaScript Quiz

Start with a div that has a class or ID like “quiz container.” Inside that div, add an h1 or h2 for the quiz title, a p or div with an ID like “question text” to hold the current question, and a group of buttons (or a ul with button styled list items) for the choices. Each choice button should have a class like “choice” so you can select all of them at once in JavaScript and loop through them.
Below the choices, add a paragraph with an ID like “feedback” where you’ll display “Correct!” or “Incorrect!” after the user picks an answer. You’ll also need a button to advance to the next question, often labeled “Next” or “Submit,” and a results area (another div or section) that stays hidden until the quiz ends. When the quiz finishes, your JavaScript will either show that hidden area or replace the entire quiz container’s inner HTML with the final score.
Required HTML elements:
- Container div wrapping the entire quiz UI
- Heading for the quiz title or instructions
- Paragraph or div for question text, updated dynamically each question
- Set of buttons (typically four) for multiple choice answers, each with the class “choice”
| Component | Purpose | Common Selector |
|---|---|---|
| Question text | Displays the current question | #question-text |
| Choice buttons | User clicks to select an answer | .choice |
| Feedback area | Shows “Correct!” or “Incorrect!” | #feedback |
Styling the Quiz Interface With CSS
Use CSS to center the quiz container on the page and set a max width around 600px so the quiz doesn’t stretch too wide on large screens. Add padding and a border or box shadow to give the container some depth. Style the choice buttons with padding, a border, a pointer cursor, and a hover state that changes the background color slightly. This makes it clear the buttons are clickable.
Define classes for different button states: .correct, .incorrect, .disabled, and .selected. When a user clicks a choice, your JavaScript will add one of these classes to the button. The .correct class might set a green background, .incorrect a red background, and .disabled a gray color with pointer events: none to block further clicks. Use simple transitions (like transition: background color 0.3s) so color changes feel smooth instead of instant.
Core CSS tasks:
- Center the quiz container and set max width to keep layout readable on desktops
- Style choice buttons with padding, border, and hover states
- Add classes for .correct (green), .incorrect (red), .disabled (gray, no pointer events)
- Use simple transitions on background color for smooth visual feedback
Keep your CSS short and practical. Most quiz tutorials clock in around 40 to 60 lines of CSS, including resets, button states, and responsive spacing. Avoid complex layouts or animations at first. Focus on clarity and usability so users know which button they clicked and whether they got it right.
Creating and Structuring Your Quiz Question Data in JavaScript
At the top of script.js, define an array called questions. Each item in the array is an object. Each object has three properties: question (a string), choices (an array of strings), and correct (a number that’s the index of the correct choice in the choices array). When you say correct is 1, that means the second item in the choices array is the right answer. Remember arrays start at index 0.
Start with three to five questions so you can test the quiz flow without writing too much data. Later you can add more questions or load them from a separate JSON file. Storing questions as objects keeps everything organized. You can loop through the array, access the current question’s text with questions[currentIndex].question, and map over the choices array to build your buttons.
Object properties every question needs:
- question: string containing the question text
- choices: array of strings, each one a possible answer
- correct: number (0 based index) pointing to the correct choice in the choices array
- Optional: points or category properties if you want scoring variations
- Optional: explanation string to show after the user answers
| Field | Type | Example Value | Purpose |
|---|---|---|---|
| question | string | “What is 2 + 2?” | The question text displayed to the user |
| choices | array | [“3”, “4”, “5”, “6”] | All possible answers as an array of strings |
| correct | number | 1 | Index of the correct answer (1 means “4” in this example) |
Set a variable for totalQuestions equal to questions.length so you always have the count available. Initialize currentIndex to 0 and score to 0 at the top of your file. These three variables (currentIndex, score, totalQuestions) drive the entire quiz state.
Rendering Quiz Questions Dynamically With JavaScript

Write a function called showQuestion or renderQuestion. Inside that function, grab the current question object using questions[currentIndex]. Select the element with ID “question text” and set its textContent to the current question’s text. Then use document.querySelectorAll(“.choice”) to get all the choice buttons and loop through them with forEach. For each button, set the text to the corresponding choice from the choices array and attach a click event listener.
Before you populate the choices, clear any previous feedback by setting the feedback element’s textContent to an empty string. If you added CSS classes like .correct or .incorrect on the last question, remove them now by looping through the buttons and calling classList.remove. This resets the visual state so the new question looks fresh.
Call showQuestion once when the page loads to display the first question. Later, after the user picks an answer and you check it, you’ll call showQuestion again to move to the next question, or you’ll call a separate showResults function if currentIndex has reached the end.
Steps to render a question dynamically:
- Select the question text element and update its textContent with questions[currentIndex].question
- Select all .choice buttons using querySelectorAll
- Loop through the buttons with forEach and set each button’s text to choices[i]
- Clear previous feedback text and remove old CSS classes from buttons
- Attach or refresh event listeners on each button to handle the next click
| DOM Method | What It Does | Common Use in Quiz |
|---|---|---|
| document.querySelector | Selects first matching element | Grab #question-text or #feedback |
| document.querySelectorAll | Selects all matching elements | Get all .choice buttons at once |
| element.textContent | Sets or gets the text inside an element | Update question text or feedback message |
Handling User Input and Answer Checking in JavaScript

When a user clicks a choice button, an event listener fires and calls a function like checkAnswer. Pass the index of the clicked choice to checkAnswer so you know which button was pressed. Inside checkAnswer, compare that index to questions[currentIndex].correct. If they match, increment score by 1 and set the feedback text to “Correct!” If they don’t match, leave score alone and set feedback to “Incorrect!”
Add a CSS class to the clicked button so the user sees immediate visual feedback. If the answer was correct, add the .correct class (green background). If incorrect, add .incorrect (red background). Some tutorials also highlight the correct answer even when the user picks the wrong one, so loop through all buttons and add .correct to the button at the correct index.
Disable all choice buttons after the first click to prevent the user from changing their answer. You can do this by looping through the buttons and adding the .disabled class or setting the disabled attribute to true. Use setTimeout to wait two seconds before advancing to the next question, giving the user time to see the feedback. After the delay, increment currentIndex and call showQuestion again, or call showResults if you’ve reached the end.
Answer checking workflow:
- Compare selected index to questions[currentIndex].correct using if/else
- Increment score if correct, leave it unchanged if incorrect
- Update feedback element with “Correct!” or “Incorrect!”
- Add .correct or .incorrect class to the clicked button and disable all buttons to block further input
| User Action | App Response |
|---|---|
| Clicks correct answer | Increment score, show “Correct!”, add green class, disable buttons, wait 2 seconds, next question |
| Clicks incorrect answer | Show “Incorrect!”, add red class to wrong button, optionally highlight correct button, disable all, wait 2 seconds, next question |
Implementing Scoring and Results Display in JavaScript
Track score with a simple variable initialized at 0. Every time checkAnswer finds a match, add 1 to score. When currentIndex equals totalQuestions (or when currentIndex is one past the last question index), stop rendering new questions and call a function like showResults instead.
Inside showResults, calculate the percentage by dividing score by totalQuestions and multiplying by 100. You can round the percentage using Math.round or toFixed. Build a result message string that says something like “You scored 3 out of 5 (60%).” Some tutorials add pass or fail logic: if percentage is 60 or higher, display “Pass”; otherwise display “Fail.”
Replace the quiz container’s innerHTML with your result message, or show a hidden results div and populate it with the score data. Include a restart button in your results HTML so users can reset the quiz. When the restart button is clicked, set currentIndex and score back to 0, call showQuestion, and hide the results area again.
Scoring and results steps:
- Increment score each time the user picks the correct answer
- Check if currentIndex equals totalQuestions after each question
- Calculate percentage as (score / totalQuestions) * 100
- Display score, percentage, and optional pass or fail message in a results section
Adding Extra Features: Timers, Shuffling, and LocalStorage

Add a timer by using setInterval to count down from 30 seconds (or 15 to 30 seconds per question). Store the interval ID in a variable and clear it with clearInterval when the quiz ends or when the user answers. Display the remaining time in a span element and update it every second. If time runs out, treat it like an incorrect answer, disable the buttons, show feedback, and move to the next question after a short delay.
Shuffle your questions array at the start using the Fisher Yates shuffle algorithm. This randomizes question order in about 10 lines of code. You can also shuffle the choices array for each question if you want answer positions to change every time. Just remember to update the correct index after shuffling so it still points to the right answer.
Use localStorage to save the user’s high score. After showing results, check if the current score is higher than the stored high score. If it is, call localStorage.setItem(‘highScore’, score). When the page loads, read the high score with localStorage.getItem(‘highScore’) and display it somewhere on the page. LocalStorage persists across browser sessions, so the high score stays even after the user closes the tab.
Common enhancements and their complexity:
- Timer: moderate; uses setInterval, clearInterval, and DOM updates every second
- Question shuffle: easy; Fisher Yates shuffle takes around 10 lines and runs once at startup
- Answer shuffle: easy; shuffle the choices array and recalculate the correct index
- LocalStorage high score: easy; one setItem call after results, one getItem call on page load
- Progress bar: moderate; track currentIndex and update a width percentage in CSS
| Feature | Complexity | Expected Behavior |
|---|---|---|
| Per-question timer | Moderate | Count down from 15 to 30 seconds; auto-advance if time runs out |
| Question shuffle | Easy | Randomize question order on page load using Fisher Yates (around 10 lines) |
| LocalStorage high score | Easy | Save best score; retrieve and display on next visit |
Making Your Quiz Accessible and Responsive
Add role and aria attributes to your quiz elements so screen readers understand the structure. Set role=”radiogroup” on the container holding the choice buttons and role=”radio” on each button. Use aria live=”polite” on the feedback area so screen readers announce “Correct!” or “Incorrect!” without interrupting the user. Make sure all interactive elements can be reached and activated with the keyboard. Attach keydown listeners to let users select answers with arrow keys and submit with Enter.
Set your quiz container’s max width to 600px and use percentages or rem units for padding and font sizes. This keeps the layout readable on phones, tablets, and desktops. Test on a small screen to make sure buttons don’t overlap and text stays legible. Use media queries if you need to stack elements or increase font size on mobile.
Accessibility and responsiveness checklist:
- Add role=”radiogroup” and role=”radio” to choice buttons
- Use aria live on feedback so screen readers announce results
- Ensure all buttons and controls are keyboard navigable (Tab, Enter, Arrow keys)
- Set max width 600px and use responsive units (rem, %) for spacing and font sizes
Focus management matters. When a new question loads, set focus on the first choice button so keyboard users don’t have to tab from the top of the page. When results display, move focus to the restart button. These small touches make the quiz usable for everyone.
How to Prevent Common JavaScript Quiz App Errors
If feedback from the last question keeps showing on the next question, you forgot to clear feedback.textContent inside your render function. Always reset feedback to an empty string before loading a new question. If buttons stay green or red from the previous question, loop through all buttons and remove .correct, .incorrect, and .disabled classes at the start of showQuestion.
Watch your index logic carefully. If you increment currentIndex before calling showQuestion, you’ll skip the first question. If you forget to check whether currentIndex is less than totalQuestions, the app will try to render a question that doesn’t exist and throw an error. Always use if (currentIndex < questions.length) before calling showQuestion.
Replacing innerHTML wipes out event listeners if you’re not careful. If you rebuild the choice buttons with innerHTML, you need to reattach listeners every time. It’s safer to keep the buttons in the HTML and just update their text and classes. If you do use innerHTML for results, make sure your restart button gets a fresh event listener after it’s injected into the DOM.
Open the browser’s DevTools console and check for errors every time you make a change. Console.log your currentIndex, score, and questions[currentIndex] inside your functions to see what’s happening at each step. If something breaks, the console will tell you the line number and error type, making it much faster to fix.
Mistakes to avoid:
- Forgetting to clear feedback text and button classes before rendering a new question
- Incrementing currentIndex at the wrong time, causing skipped questions or undefined errors
- Using innerHTML to rebuild buttons without reattaching event listeners
- Not checking if currentIndex is within bounds before accessing questions[currentIndex]
- Leaving disabled state on buttons when restarting the quiz
When to Seek Additional Guidance or Next Steps After Building Your Quiz
Once you’ve built a working quiz with three to five questions, try adding more questions, tweaking the styles, or implementing one of the extras like a timer or shuffle. If you want to see how other developers structure their code, search for codepen demo for quiz tutorial on CodePen and study a few examples. Live demos let you see the finished app, inspect the code, and fork it to experiment with your own changes.
When you’re ready to share your quiz, deploy quiz app to GitHub Pages or use Netlify for free hosting. Both platforms let you push your three files to a repository and serve them live on the web in minutes. Deployment is a good next step because it forces you to double check file paths, test on different devices, and see how your app performs outside your local environment.
Next steps and project ideas:
- Add a progress bar that fills as the user moves through questions
- Implement true or false questions alongside multiple choice
- Load questions from an external JSON file or a public API
- Add animations when transitioning between questions or showing results
Final Words
You wired up HTML, CSS, and JavaScript to render questions, attach event listeners, check answers, and show a results screen. That’s the core flow in action.
You worked with three files (index.html, styles.css, script.js), stored questions as objects, updated the DOM, and incremented a score. You also learned easy extras like timers, shuffling, and saving high scores.
Use this build a simple interactive quiz app with javascript tutorial as a checklist: tweak the UI, add a timer or shuffle, then deploy. Nice, you’ve built something real and useful.
FAQ
Q: Can you build an app with JavaScript?
A: You can build an app with JavaScript by using HTML and CSS for the UI and JavaScript for logic; run it in a browser or with Node/electron, adding frameworks as the project grows.
Q: How to make your own interactive quiz?
A: Making your own interactive quiz means creating three files—index.html, styles.css, script.js—storing questions as an array of objects, updating the DOM, adding click event listeners, and displaying score and feedback.
Q: Can Chatgpt create a quiz?
A: ChatGPT can create a quiz by generating questions, answer choices, JSON or full HTML/CSS/JS files and code snippets; it can’t run or host the app, but it gives ready-to-use assets to paste and test.

