

Still using XMLHttpRequest? JavaScript Fetch is the built-in, promise-based way to make HTTP requests that keeps your async code readable and easy to chain.
This post walks through core usage and copy-paste GET/POST examples, shows how to set headers and auth, and gives simple error-handling patterns you can reuse.
You’ll see async/await and .then() patterns, learn to check response.ok before parsing, and get small wins that prove the requests work in your browser.
Follow along, and by the end you’ll have reliable fetch calls you can drop into a project.
Core Usage of the Fetch API for JavaScript Requests

The Fetch API is JavaScript’s modern, built-in way to make HTTP requests from the browser. It replaced the older XMLHttpRequest (XHR) approach by using promises, which makes your code easier to read and chain. Instead of writing nested callback functions, you call fetch() and handle the result with .then() or async/await. That promise-based flow lets you write cleaner async code and combine multiple requests without callback hell.
When you call fetch(url), you’re passing one mandatory argument: the URL of the resource you want to fetch. The function returns a promise that resolves to a Response object as soon as the browser receives the HTTP headers, before the full body arrives. That Response object includes key fields like response.ok (a boolean that’s true for 2xx statuses), response.status (the numeric HTTP status code, like 200 or 404), and response.statusText (a short text description, like “OK” or “Not Found”). By default, fetch() sends a GET request, so you don’t need to specify the method unless you’re posting, updating, or deleting data.
To work with the actual data from the response, you call methods like response.json() or response.text(), both of which return a second promise that resolves to the parsed body. Most APIs send JSON, so response.json() is the go-to method. The two-stage promise design means you first wait for the headers, check response.ok to confirm success, then wait again for the body to parse. Skipping the response.ok check is a common beginner mistake. Fetch won’t automatically throw an error on a 404 or 500, so you have to handle those statuses yourself.
Copy-paste-ready GET request pattern:
- Call fetch with a URL.
fetch('https://jsonplaceholder.typicode.com/users')starts the request and returns a promise. - Check response.ok before parsing.
if (!response.ok) throw new Error('HTTP ' + response.status);stops non-2xx responses from proceeding. - Parse JSON.
return response.json();inside a.then()block returns a new promise that resolves to the parsed data. - Use the data. In a second
.then(), log, render, or store the returned array or object (like a list of ten users from the example endpoint). - Catch network errors. Add
.catch(err => console.error('Fetch failed:', err));to handle network failures or thrown errors from status checks.
Practical JavaScript Fetch GET Examples and JSON Handling

When you fetch data from an API, the response body can arrive as JSON, plain text, binary blob, or even a stream. The most common pattern is response.json(), which takes the incoming JSON string and parses it into a JavaScript object or array. If your endpoint sends HTML or plain text instead, use response.text(). It returns a promise that resolves to the raw string. Calling the wrong parser (like using json() on non-JSON data) will throw a parse error, so match your parsing method to the server’s Content-Type header.
Once you have the parsed JSON, you can loop through the results and update your page. For example, if you fetch a list of users from https://jsonplaceholder.typicode.com/users, you’ll get back an array of ten user objects. To keep the DOM updates efficient, create a DocumentFragment, loop over each user, build a new <li> element containing an <h2> for the user’s name and a <span> for the email, then append each <li> to the fragment. Finally, append the entire fragment to your <ul id="authors"> in one go. This approach avoids multiple reflows and keeps the browser fast.
Step-by-step GET and render sequence:
- Perform the fetch.
fetch('https://jsonplaceholder.typicode.com/users')starts the GET request. - Check response.ok. Immediately after the promise resolves, throw an error if
response.okisfalse. - Parse JSON. Call
response.json()and return the promise so you can chain the next.then(). - Loop and render. In the final
.then(), usedata.forEach(user => { ... })to build DOM elements, settextContentorinnerHTML, and append them to a fragment or directly to the target container.
Creating Resources with JavaScript Fetch POST Requests

While GET retrieves data, POST sends new data to the server. To switch from GET to POST, you pass a second argument to fetch(url, options), where options is an object containing method, headers, and body. Setting method: 'POST' tells the browser you’re creating or updating a resource. The body field holds your payload, and if you’re sending JSON, you must convert your JavaScript object to a JSON string using JSON.stringify(data). Forgetting that stringify step is one of the most common beginner mistakes. Sending a plain object without stringifying it won’t work.
Headers are just as important as the body. When you send JSON, set 'Content-Type': 'application/json' in the headers object so the server knows how to parse the incoming payload. For example, if you’re creating a user with { name: 'Alice', email: 'alice@example.com' }, your fetch call looks like this: fetch('https://api.example.com/users', { method: 'POST', headers: { 'Content-Type': 'application/json' }, body: JSON.stringify(data) }). Some APIs also expect a charset, like 'Content-Type': 'application/json; charset=UTF-8'. You can also construct a Request object separately and pass that object to fetch() instead of building the options inline. It’s the same under the hood, just a different syntax.
If you’re sending form data instead of JSON, you’d use a FormData object and typically let the browser set the Content-Type automatically to multipart/form-data. For URL-encoded forms, you’d set 'Content-Type': 'application/x-www-form-urlencoded' and send the body as a URL-encoded string. Different APIs expect different formats, so always check the documentation.
| Method | Required Headers | Body Format |
|---|---|---|
| JSON POST | Content-Type: application/json | JSON.stringify(object) |
| FormData POST | (auto-set by browser) | new FormData() |
| URL-encoded POST | Content-Type: application/x-www-form-urlencoded | URL-encoded string (e.g., URLSearchParams.toString()) |
| Multipart upload POST | Content-Type: multipart/form-data | FormData with file inputs |
Authentication Headers and Secure JavaScript Fetch Requests

Most real APIs require some form of authentication, usually through an HTTP header. The two most common patterns are Bearer tokens (used by OAuth 2.0 and JWT-based APIs) and API keys. To send a Bearer token, add an 'Authorization': 'Bearer YOUR_TOKEN' entry to your headers object. For API keys, some services use a custom header like 'x-api-key': 'YOUR_KEY', while others use Basic Auth, which requires encoding a username and password as 'Authorization': 'Basic ' + btoa('user:pass'). Always check your API’s documentation to see which header and format it expects.
Hardcoding secrets directly in your JavaScript is a security risk, especially in client-side code, because anyone can inspect your source and grab the token. In production apps, store sensitive keys in environment variables or use a backend proxy that injects the auth header before forwarding requests to the third-party API. Browsers also restrict certain header names for security. Headers like Host, Origin, and Referer are controlled by the browser and can’t be overridden from JavaScript. These “forbidden headers” are set automatically and keep the browser secure during cross-origin requests.
Key header formats for authentication and content negotiation:
- Bearer token.
headers: { 'Authorization': 'Bearer abc123xyz' }for OAuth 2.0 or JWT-based APIs. - Basic Auth.
headers: { 'Authorization': 'Basic ' + btoa('username:password') }for simple user/pass authentication. - Custom API key.
headers: { 'x-api-key': 'your-api-key-here' }when the service uses a proprietary key header. - Accept header.
headers: { 'Accept': 'application/json' }tells the server you want JSON instead of XML or HTML.
JavaScript Fetch Error Handling and Response Status Management

The Fetch API doesn’t treat HTTP error statuses (like 404 or 500) as promise rejections. If the network request completes and you get a response, the promise resolves, even if the status code is 404 Not Found or 500 Internal Server Error. That’s why you must manually check response.ok or response.status before assuming the request worked. Network failures (no internet, DNS lookup failure, server unreachable) do cause the promise to reject, so those errors land in your .catch() block. HTTP errors, however, need an explicit throw inside your .then() to turn them into catchable errors.
A solid error-handling pattern looks like this: after fetch(url) resolves, check if (!response.ok) and throw a new error that includes the status code and text. throw new Error('HTTP ' + response.status + ': ' + response.statusText);. That thrown error will skip the rest of the .then() chain and jump straight to your .catch() handler. Common status codes you’ll see include 200 (OK), 404 (Not Found), 401 (Unauthorized), 403 (Forbidden), and 500 (Internal Server Error). Handling these explicitly helps users understand what went wrong instead of seeing a vague “Fetch failed” message.
JSON parse errors are another common issue. If your server returns an error page in HTML instead of JSON, calling response.json() will throw a parse exception. Wrapping your parse call in a try/catch or checking the Content-Type header before parsing can prevent confusing error messages. Timeouts aren’t built into fetch by default, but you can implement them using AbortController. Create a controller, pass its signal to fetch(url, { signal: controller.signal }), and call controller.abort() after a set delay to cancel the request.
Retry and Backoff Patterns
When a request fails because of a temporary network issue or a 503 Service Unavailable status, retrying can help. A simple retry loop tries the request again after a short delay, but a better approach uses exponential backoff: wait one second before the first retry, two seconds before the second, four seconds before the third, and so on. This pattern avoids hammering a struggling server and gives the service time to recover. You can implement it with a recursive async function that catches errors, checks if the retry limit is reached, waits the backoff duration, then calls itself again. Stop retrying on permanent errors like 404 or 401. Those won’t fix themselves.
Async/Await with JavaScript Fetch for Cleaner Promise Flows
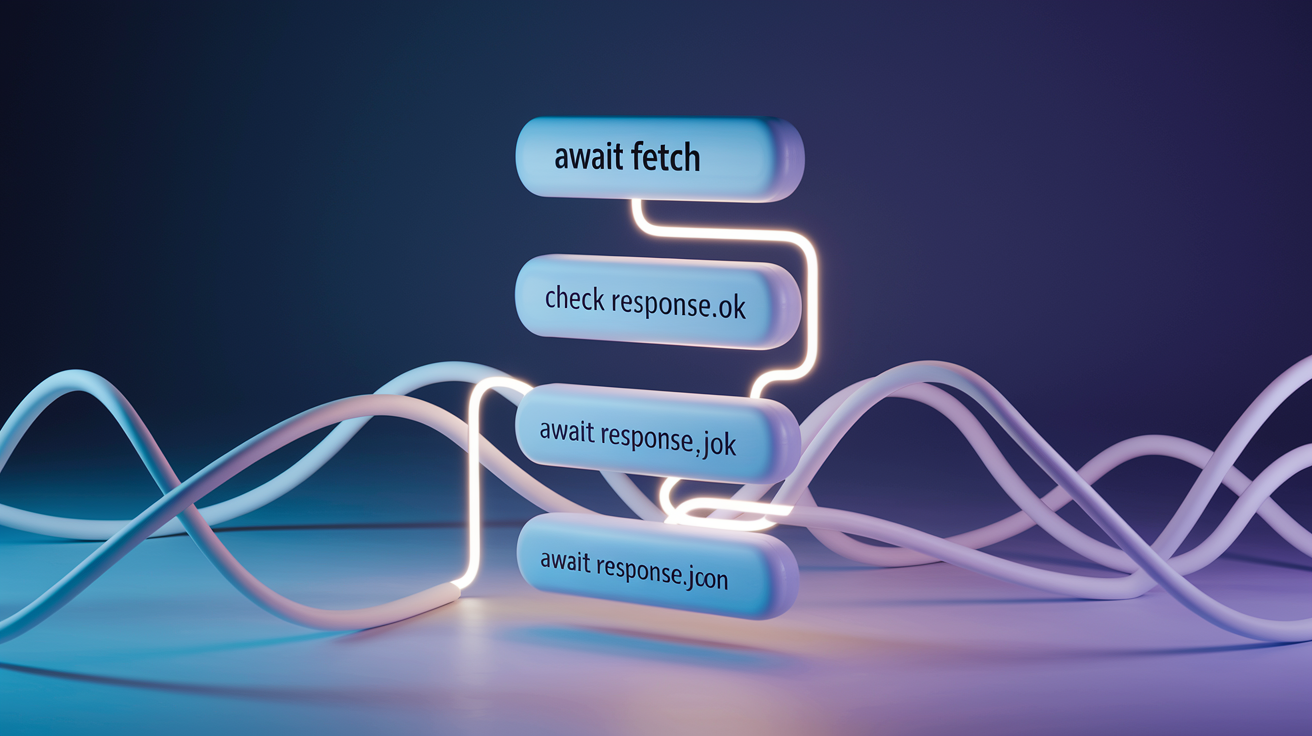
Using .then() chains works, but async/await syntax makes your fetch code look more like synchronous steps. Instead of chaining .then() calls, you write const response = await fetch(url); inside an async function. That pauses execution until the promise resolves, then assigns the Response object to response. You still need to check response.ok and throw an error if it’s false, then call await response.json() to parse the body. The benefit is readability. Your code flows top to bottom without nested callbacks.
Error handling with async/await uses try/catch instead of .catch(). Wrap your fetch and JSON parse calls in a try block, and handle errors in the catch block. If the network fails or you throw an error after checking response.ok, the catch runs. Under the hood, async/await is just syntactic sugar over promises. Your code still waits for the same two stages (response headers, then body parsing), but the structure is easier to scan and debug.
Async/await fetch pattern in three steps:
- Await the fetch call.
const res = await fetch(url);pauses until the Response object is ready. - Check the status.
if (!res.ok) throw new Error('HTTP ' + res.status);stops execution on error statuses. - Await JSON parse.
const data = await res.json();waits for the body to parse, then returns the data for use in the rest of your function.
Handling Advanced Fetch Use Cases: Binary, Streams, and Large Payloads

Not every response is JSON. Sometimes you fetch images, PDFs, or other binary files. For those, use response.blob() to get a Blob object you can pass to URL.createObjectURL() for display in an <img> tag or download link. If you need raw binary data as an ArrayBuffer (for WebGL, audio processing, or file manipulation), call response.arrayBuffer() instead. Both methods return a promise that resolves to the parsed binary data.
For very large responses (like a huge JSON file or a live data feed), you can stream the response body instead of waiting for the entire payload to download. Access the stream with response.body.getReader(), which returns a ReadableStream reader. Use a TextDecoder to convert binary chunks into strings, then loop with reader.read() until done is true. Each iteration gives you a chunk of data you can append to a buffer or process immediately. Streaming improves responsiveness when working with large downloads or real-time APIs, because you can start rendering or parsing data before the full response arrives.
| Data Type | Parsing Method | Best Use Case |
|---|---|---|
| JSON | response.json() | API data, structured objects and arrays |
| Text | response.text() | HTML, plain text, CSV files |
| Blob | response.blob() | Images, PDFs, downloadable files |
| ArrayBuffer | response.arrayBuffer() | Audio, video, binary file manipulation |
| Stream | response.body.getReader() | Large downloads, real-time data feeds, progress tracking |
JavaScript Fetch CORS Rules, Preflight Requests, and Cross-Origin Behavior

When your browser makes a fetch request to a different domain (or even a different port on the same domain), the browser enforces CORS, Cross-Origin Resource Sharing. The server must include an Access-Control-Allow-Origin header in its response that matches your origin, or the browser will block the response. If you try to fetch https://api.example.com/data from https://yoursite.com, the API server has to explicitly allow yoursite.com (or use * for public APIs). Without that header, the fetch completes but the browser won’t let your JavaScript read the response.
For “simple” requests (GET, POST with basic headers), the browser sends the request immediately. But if you add custom headers (like Authorization or x-api-key) or use methods like PUT or DELETE, the browser first sends a preflight OPTIONS request to ask the server for permission. The server responds with Access-Control-Allow-Methods and Access-Control-Allow-Headers to list what’s allowed. Only after that preflight succeeds does the browser send your actual request. This two-step process protects servers from unexpected cross-origin writes.
The credentials option controls whether cookies and authentication headers are sent with cross-origin requests. By default, fetch uses credentials: 'same-origin', meaning cookies are only sent to your own domain. Set credentials: 'include' to send cookies to third-party APIs, but the server must respond with Access-Control-Allow-Credentials: true. Using credentials: 'omit' guarantees no cookies are sent, even to your own domain.
Handling no-cors and Restricted Responses
Setting mode: 'no-cors' in your fetch options lets you make a request to a server that doesn’t support CORS, but the browser severely restricts what you can read from the response. You can send the request (useful for logging or analytics beacons), but you can’t access the status, headers, or body. The response is “opaque.” This mode is rarely useful for data-fetching APIs. Stick with the default mode: 'cors' and work with your backend team to set the correct CORS headers.
Comparing JavaScript Fetch with XMLHttpRequest and Axios

XMLHttpRequest (XHR) was the original way to make HTTP requests in JavaScript, but it uses callback-based APIs and event listeners that feel clunky compared to promises. With XHR, you create a new XMLHttpRequest object, call open(method, url), attach onload and onerror event handlers, then call send(). Fetch simplifies this into a single function call that returns a promise, letting you chain .then() or use async/await. Fetch also makes streaming easier. You can access response.body as a ReadableStream, while XHR requires manual chunk handling through the progress event.
Axios is a popular third-party library that wraps fetch (or XHR in older environments) and adds conveniences like automatic JSON parsing, request and response interceptors, and built-in timeout support. With Axios, you don’t need to manually call response.json(). The library does it for you and returns response.data directly. Interceptors let you modify requests before they’re sent or responses before they reach your code, which is helpful for adding auth tokens or logging. Axios also provides a cancelToken API to abort requests, while native fetch requires AbortController.
Practical differences at a glance:
- Promise-based flow. Fetch and Axios both use promises; XHR uses callbacks and event listeners.
- JSON parsing. Fetch requires manual
response.json(); Axios parses automatically; XHR needs manualJSON.parse(xhr.responseText). - Progress events. XHR has built-in
progressevents; fetch usesReadableStream; Axios supports progress callbacks via config.
Final Words
You wrote a fetch GET, checked response.ok, parsed JSON, and rendered results in the DOM. You also saw how response.status and response.statusText show HTTP details.
You learned to POST with JSON.stringify, set Content-Type, send auth headers, and handle errors with try/catch, AbortController, and retry patterns. We covered streaming large payloads, CORS quirks, and why async/await cleans up promise chains.
Now use javascript fetch to pull real data, handle failures gracefully, and ship small features with confidence. You’ve got this.
FAQ
Q: What is fetch() and why use it instead of XMLHttpRequest?
A: The fetch() function is a modern, promise-based browser API for HTTP requests, simpler than XMLHttpRequest, supports streaming, and plays nicely with promise chains and async/await for clearer code flows.
Q: How do I make a simple GET request with fetch to retrieve JSON?
A: To make a simple GET request with fetch to retrieve JSON, call fetch(url), check res.ok, then await res.json() to get parsed data for use in your app or UI.
Q: How do I check HTTP status and response.ok with fetch?
A: You check HTTP status and response.ok by inspecting res.ok (true for 2xx), and using res.status and res.statusText; throw an error when res.ok is false so the caller can handle it.
Q: How do I parse JSON from a fetch response and when should I use response.text()?
A: To parse JSON from a fetch response, call and await res.json(); use res.text() when the endpoint returns plain text or when JSON parsing would fail on non-JSON payloads.
Q: How do I create a POST request with fetch and send JSON?
A: To create a POST request with fetch and send JSON, call fetch(url, { method: ‘POST’, headers: {‘Content-Type’:’application/json; charset=UTF-8′}, body: JSON.stringify(data) }) and handle the response.
Q: How do I set headers like Content-Type and Authorization (Bearer token) with fetch?
A: You set headers like Content-Type and Authorization by adding a headers object in fetch options, e.g. headers: { ‘Content-Type’:’application/json’, ‘Authorization’:’Bearer YOUR_TOKEN’ }; avoid hardcoding secrets.
Q: How do I handle network errors, HTTP errors, timeouts, and retries with fetch?
A: Handle network errors with .catch, handle HTTP errors by checking res.ok and throwing, use AbortController for timeouts, and apply exponential backoff with limited retries for transient failures.
Q: How does async/await work with fetch for cleaner code?
A: Async/await with fetch means you await fetch(url), check res.ok, then await res.json() inside a try/catch block, producing top-to-bottom code that’s easier to read and debug.
Q: How do I handle binary data, blobs, arrayBuffer, and streaming large responses with fetch?
A: Handle binary data with res.blob() or res.arrayBuffer(); for large responses use res.body.getReader() and a loop with a TextDecoder to process chunks progressively and reduce memory pressure.
Q: What do I need to know about CORS, preflight OPTIONS, and credentials when using fetch?
A: Know that CORS is enforced by browsers and requires server-sent Access-Control-Allow-Origin; preflight OPTIONS runs for certain headers/methods; use credentials:’include’ or ‘omit’ for cookies; no-cors gives opaque responses.
Q: How does fetch compare to XMLHttpRequest and Axios for HTTP requests?
A: Fetch is promise-based and lightweight; XMLHttpRequest is callback-based with easier progress events; Axios adds features like interceptors, auto JSON parsing, and automatic rejection on non-2xx responses.

