

Stop copying framework breakpoints.
Breakpoints for responsive design are not a list of device names.
In this guide you’ll get the essential pixel values, 320, 360, 375, 768, 1024, 1200, 1440, and the media query patterns that work in production, like mobile-first min-width and when to use max-width.
I’ll show how to pick a few meaningful breakpoints, test where your layout truly breaks, and write clean media queries that avoid extra testing overhead.
By the end you’ll have clear standards you can reuse across projects.
Definitive Overview of Breakpoints for Responsive Design
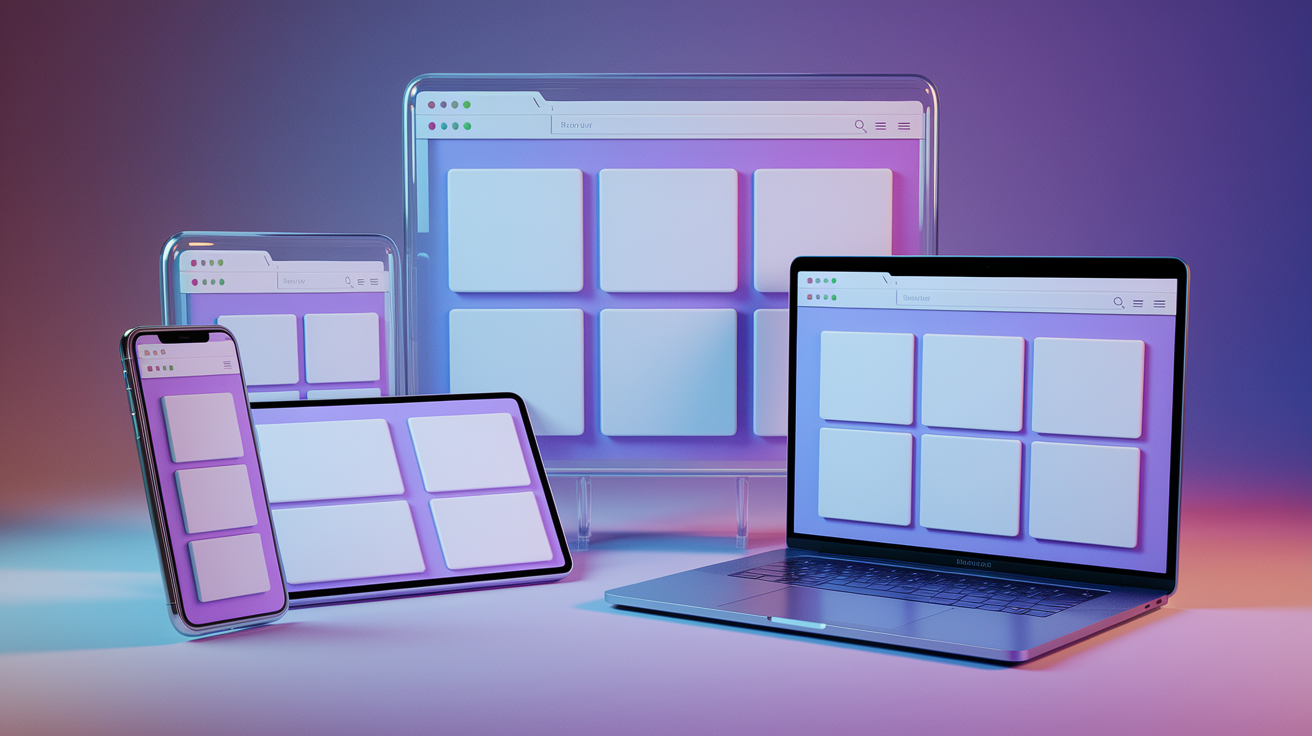
Breakpoints for responsive design are specific viewport widths where your CSS layout rules change to keep content usable and readable. Instead of forcing a desktop layout onto a phone screen, you define width thresholds (usually expressed as min-width or max-width values in media queries) where columns collapse, navigation switches to a hamburger icon, or font sizes adjust. A breakpoint might be a single value like 768px, but in practice designers work with ranges: “below 500px,” “500px to 1200px,” “1200px and up.”
Most teams rely on a small set of common breakpoint values to cover the majority of real devices. The typical tiers include extra-small (up to 500px), small (500px to 1200px), medium (1200px to 1400px), and large (1400px and above). Within those ranges, you’ll see specific widths appear again and again. 320px for the smallest phones. 768px for tablets. 1024px for laptops. 1440px for large desktops. You don’t need a breakpoint for every device ever made. Choose the handful of widths where your layout actually breaks or becomes awkward to read.
Here’s a quick reference of the most widely used breakpoint values:
- 320px, 360px, 375px – Extra-small mobile devices and common small phone widths
- 480px, 640px – Larger phones in landscape and small tablets in portrait
- 768px, 1024px – Tablets in portrait and landscape, small laptops
- 1200px, 1280px, 1440px – Standard desktop and laptop displays
- 1536px, 1600px, 1920px – Large monitors and ultra-wide screens
- Custom values (e.g., 642px, 860px, 911px) – Content-driven breakpoints set exactly where layout breaks
Designers typically use only two to three key breakpoints in production because each breakpoint adds testing overhead and layout complexity. The strategy is to start mobile-first, define base styles for the smallest screen, then add @media (min-width: 768px) and @media (min-width: 1200px) to layer in tablet and desktop layouts. Here’s a minimal mobile-first example:
/* Base styles for mobile (320px and up) */
.container { padding: 1rem; }

/* Tablet and larger */
@media (min-width: 768px) {
  .container { padding: 2rem; }
}
That’s the core idea: pick meaningful width thresholds, write media queries at those widths, and adjust layout, typography, or visibility to match the screen size.
Mechanics of Breakpoints and Media Queries

Breakpoints work by wrapping CSS rules inside media queries that check the viewport width. When the browser’s width meets the condition (say, min-width: 768px) the rules inside that query apply. If the condition isn’t met, those rules are ignored. This lets you layer styles progressively: start with mobile defaults, then add tablet styles at 768px, then desktop styles at 1200px. The order matters. In a mobile-first workflow, you write min-width queries in ascending order. In a desktop-first workflow, you write max-width queries in descending order.
Modern browsers also support Media Queries Level 4 range syntax, which looks like @media (width <= 80em) instead of @media (max-width: 80em). This syntax is cleaner but was only widely supported after 2023. For maximum compatibility, most teams still use the classic min-width and max-width form. Media queries can check more than just width. Common features include height, orientation: portrait, aspect-ratio, prefers-reduced-motion, and hover. But viewport width is the primary trigger for responsive breakpoints.
Here’s a snippet showing both mobile-first and desktop-first patterns side by side:
/* Mobile-first (base = small screens) */
.grid { display: block; }
@media (min-width: 768px) {
  .grid { display: grid; grid-template-columns: repeat(2, 1fr); }
}

/* Desktop-first (base = large screens) */
.grid { display: grid; grid-template-columns: repeat(3, 1fr); }
@media (max-width: 1024px) {
  .grid { grid-template-columns: repeat(2, 1fr); }
}
@media (max-width: 640px) {
  .grid { display: block; }
}
Key mechanical facts about media queries and breakpoints:
- Media queries check viewport width at render time and re-evaluate on window resize
min-widthis inclusive:@media (min-width: 768px)applies at exactly 768px and above- You can combine conditions with
and, like@media (min-width: 768px) and (max-width: 1023px)to create a range - CSS Grid and Flexbox layouts naturally adapt within breakpoints. Grid can redefine
grid-template-columnsand Flex can switchflex-directionor enable wrapping at different widths
Standard Breakpoint Values for Mobile, Tablet, Laptop, and Desktop
Real-world analytics and device sales data have converged on a consistent set of breakpoint widths that cover the majority of users. You’ll see these values repeated across frameworks, design systems, and production sites. The ranges cluster around five tiers: extra-small mobile (320 to 375px), small devices and phablets (480 to 640px), tablets (768 to 1024px), laptops and desktops (1200 to 1440px), and large monitors (1920px and up). Within each tier, specific pixel values recur because they match popular device viewports or are convenient round numbers.
For extra-small mobile, 320px is the legacy baseline (iPhone 5 and older small Androids), 360px is the most common Android phone width, and 375px matches the iPhone SE and iPhone 12/13 mini. In the small tier, 480px catches landscape phones and 640px is Tailwind’s small breakpoint. Tablets typically start at 768px (iPad portrait) and extend to 1024px (iPad landscape and small laptops). Desktop breakpoints begin around 1200px, which is wide enough for multi-column dashboards, and extend through 1280px (common laptop resolution), 1440px (large desktop monitors), and up to 1920px for full-HD displays. Ultra-wide monitors (2560px, 3440px) exist but are rare enough that most designers cap content containers at 1440px or 1600px to maintain readability.
| Size Tier | Example Widths | Typical Layout Behavior |
|---|---|---|
| Extra-small mobile | 320px, 360px, 375px | Single-column layout, full-width images, hamburger navigation, increased tap targets |
| Small (phablets, landscape phones) | 480px, 568px, 640px | Still mostly single-column, slightly larger fonts, two-column card grids may appear |
| Medium (tablets) | 768px, 834px, 1024px | Two-column or three-column grids, visible sidebar or nav drawer, larger hero images |
| Large (laptops, desktops) | 1200px, 1280px, 1440px | Multi-column dashboards, horizontal navigation, fixed sidebars, max-width containers |
| Extra-large (wide monitors) | 1536px, 1600px, 1920px+ | Content capped at max-width, background fills, larger imagery, optional fourth column |
These standard values are guides, not rules. If your analytics show 60% of users on devices between 390px and 430px, you might add a custom breakpoint at 414px to fine-tune that range. The key is to test your actual content at these widths and confirm that text, images, and interactive elements remain usable. Don’t blindly copy a framework’s breakpoints if your content behaves differently.
Mobile‑First vs Desktop‑First Breakpoint Strategies
Mobile-first and desktop-first are two opposing workflows for organizing your breakpoints and media queries. In a mobile-first approach, you write base styles for the smallest viewport (usually 320px or 360px), then progressively enhance with @media (min-width: ...) queries as the screen gets larger. In a desktop-first approach, you write base styles for a large desktop viewport (often 1200px or 1440px), then progressively strip away or simplify layout with @media (max-width: ...) queries as the screen shrinks. Both strategies produce the same final result if done correctly, but the process and mental model differ.
Mobile-first is now the recommended default for most projects. More than 62% of global web traffic comes from mobile devices, so designing and coding for small screens first forces you to prioritize essential content and streamline navigation. Mobile-first CSS is also simpler to write and maintain because you’re adding features as space allows, rather than removing features as space disappears. Performance-wise, mobile-first can deliver slightly smaller initial CSS payloads because mobile styles are in the base layer and desktop enhancements are conditional.
Desktop-first still makes sense in specific cases: internal enterprise tools where 90% of users are on laptops, legacy projects already written desktop-first, or design teams whose workflow starts with wide mockups. The downside is that desktop-first often leads to bloated mobile stylesheets because you’re overriding large-screen defaults. If you’re working on a brand-new public-facing site or app, start mobile-first.
Here’s a comparison of the two strategies:
- Mobile-first: Base styles apply to smallest screens; use
min-widthqueries ascending (e.g., 768px, 1200px) - Desktop-first: Base styles apply to largest screens; use
max-widthqueries descending (e.g., 1024px, 640px) - Mobile-first: Forces essential-first design; easier to add features than remove them
- Desktop-first: Can be faster when targeting primarily desktop users; harder to simplify layout retroactively
- Mobile-first: Smaller initial CSS footprint; conditional enhancements loaded only when needed
- Desktop-first: May carry unused large-screen styles on mobile; more overrides required
- Mobile-first: Aligns with progressive enhancement philosophy; graceful degradation built in
- Desktop-first: Aligns with graceful degradation; can feel like “taking away” from the full experience
- Mobile-first: Industry standard since around 2015; most frameworks default to min-width breakpoints
- Desktop-first: Older pattern; still valid for specific use cases but less common in modern greenfield projects
Pick one strategy and stick with it across your project. Mixing mobile-first and desktop-first queries in the same stylesheet creates confusion and makes debugging harder.
Framework Breakpoints: Bootstrap, Tailwind, and Others
Popular CSS frameworks ship with predefined breakpoints baked into their grid systems and utility classes. These defaults are battle-tested across millions of sites and cover the vast majority of device widths. If you’re using a framework, you’ll usually adopt its breakpoints to keep your custom CSS consistent with the framework’s responsive utilities. If you’re not using a framework, these breakpoint sets still serve as solid starting points.
Bootstrap’s breakpoint system uses five named tiers (sm, md, lg, xl, xxl) plus an implicit extra-small tier (xs) that applies below the smallest named breakpoint. Tailwind CSS uses a similar five-tier system with slightly different pixel values. Both frameworks are mobile-first, so their utilities apply at the specified width and above. For example, Bootstrap’s .col-md-6 applies at 768px and wider, and Tailwind’s md:grid-cols-2 applies at 768px and wider. The table below lists the exact default breakpoint values for both frameworks.
| Framework | Breakpoint Name | Min-Width | Notes |
|---|---|---|---|
| Bootstrap | xs | 0px (implicit) | Base styles; no media query |
| Bootstrap | sm | 576px | Small devices (landscape phones) |
| Bootstrap | md | 768px | Medium devices (tablets) |
| Bootstrap | lg | 992px | Large devices (desktops) |
| Bootstrap | xl | 1200px | Extra-large devices |
| Bootstrap | xxl | 1400px | Extra-extra-large devices |
| Tailwind CSS | sm | 640px | Small devices and up |
| Tailwind CSS | md | 768px | Medium devices (tablets) |
| Tailwind CSS | lg | 1024px | Large devices (laptops) |
| Tailwind CSS | xl | 1280px | Extra-large devices |
| Tailwind CSS | 2xl | 1536px | Ultra-wide screens |
Both frameworks let you customize these values in their configuration files. If your analytics show heavy traffic at 414px (iPhone Plus/Pro Max), you can add a custom xs or sm breakpoint at that width. Other frameworks (Foundation, Bulma, Material-UI) follow similar patterns, typically with breakpoints clustered around 600px, 768px, 1024px, and 1200px. Some design systems add very small breakpoints for smartwatches (around 280px) or very large breakpoints for 4K displays (2560px), but those are edge cases. The core lesson: use your framework’s defaults as the foundation, then add one or two custom breakpoints only where your content actually demands them.
Choosing Custom Breakpoints Based on Content Behavior

Content-driven breakpoints emerge when you let your layout tell you where it breaks, rather than targeting specific device widths. This approach starts with a fluid layout and no media queries, then you resize your browser and watch for the exact moment when text wraps awkwardly, images overlap, buttons crowd each other, or readability suffers. At that precise width (maybe 642px, 860px, or 911px) you add a breakpoint and adjust the layout. The result is a set of breakpoints tailored to your actual content rather than a generic list of device sizes.
The content-first method produces fewer, more meaningful breakpoints. Instead of blindly inserting queries at 320px, 480px, 640px, 768px, 1024px, 1200px, and 1440px, you might end up with just three custom values: 486px (where your login form breaks), 920px (where your three-column grid becomes cramped), and 1300px (where your hero image needs a different aspect ratio). These odd numbers are fine. A breakpoint at 642px is valid if that’s where your navigation stops fitting horizontally. Precision matters more than round numbers.
To identify content-driven breakpoints, follow this process:
- Build your layout with flexible units (percentages,
frunits,max-width: 100%) and no media queries yet - Open your page in Chrome DevTools Device Mode or Firefox Responsive Design Mode and set the viewport to the smallest target width (usually 320px)
- Slowly drag the viewport wider, watching for layout problems: text overflow, awkward line breaks, buttons wrapping mid-word, images losing aspect ratio, columns becoming too narrow to read
- When you spot a visual break, note the exact pixel width from the DevTools toolbar, then write a media query at that width to fix the issue
- Repeat the dragging process from that new breakpoint up to the widest viewport you support (1920px or wider), adding breakpoints only where layout degrades
This method respects your design’s unique needs. A news article with long paragraphs might need a breakpoint at 720px to switch from single-column to a sidebar layout, while a photo gallery might not need any breakpoint until 900px when thumbnails can shift from two columns to three. Let the content guide you.
Component‑Level Breakpoints and Container Queries
Traditional media queries respond to the viewport width, which means every component on the page changes layout at the same global breakpoints. Container queries flip that model: a component can adapt based on the width of its parent container instead of the entire screen. This is useful when you have a reusable card, sidebar widget, or form module that might appear in a narrow sidebar on one page and a wide main column on another. With container queries, the card’s internal layout responds to its container’s width, not the viewport.
Container queries became widely supported in major browsers during 2023. The syntax requires two steps: first, mark the parent element as a container with container-type: inline-size, then write @container queries inside the child’s styles. For example, imagine a .widget that should switch from single-column to two-column layout when it has at least 30rem of space. You don’t care if the viewport is 768px or 1200px; you only care whether the widget’s container is wide enough.
Here’s a basic container-query example:
.widget {
  container-type: inline-size; /* Makes this element a container */
}

.widget .content {
  display: block;
}

@container (min-width: 30rem) {
  .widget .content {
    display: grid;
    grid-template-columns: repeat(2, 1fr);
  }
}
When the .widget container is at least 30rem wide, the .content inside switches to a two-column grid. If the same widget is placed in a narrow sidebar (say, 20rem wide), it stays single-column, even if the viewport is 1440px. This decouples layout logic from global screen size and makes components truly portable across different page regions.
Components well-suited for container queries:
- Card modules – single-column on narrow sidebars, two-column in main content areas
- Navigation widgets – switch from vertical list to horizontal tabs based on available width
- Form sections – stack labels above inputs when container is narrow, place them side-by-side when wide
- Image galleries – adjust thumbnail grid columns (2, 3, or 4) based on container width without reference to viewport
Container queries don’t replace viewport media queries. You’ll still use global breakpoints for major layout shifts: collapsing a sidebar, switching from hamburger to horizontal nav, or changing the page grid from one column to three. Container queries handle the micro-responsiveness inside reusable components. Combine both techniques for maximum flexibility.
Responsive Typography and Fluid Scaling Across Breakpoints
Responsive typography ensures text remains readable and proportional as viewport width changes. The simplest approach is to define font sizes in relative units (em or rem) and adjust those sizes at each breakpoint with media queries. A more modern technique is fluid typography, which uses CSS functions like clamp(), min(), and max() combined with viewport-relative units (vw, vh) to scale fonts smoothly between breakpoints without discrete jumps. Fluid scaling reduces the number of media queries you need and creates a more polished experience on every screen size.
The clamp() function takes three arguments: a minimum size, a preferred size (often expressed with vw), and a maximum size. The browser calculates the preferred size and clamps it between the min and max. For example, font-size: clamp(1rem, 2vw + 0.5rem, 1.5rem); means the font will never shrink below 1rem or grow beyond 1.5rem, but it will scale smoothly with viewport width in between. This technique works for any CSS property (padding, margin, gap, border-radius) but is most commonly applied to typography. Icons and SVGs also benefit from fluid scaling when you set their widths and heights using clamp() or max() with vw units.
Here’s a fluid typography snippet using clamp():
h1 {
  font-size: clamp(1.5rem, 4vw, 2.5rem); /* Scales smoothly between 1.5rem and 2.5rem */
}

p {
  font-size: clamp(1rem, 2.5vw, 1.125rem);
  line-height: 1.6;
}
Recommended fluid units and techniques for responsive type:
clamp(min, preferred, max)– preferred method for fluid font sizes; keeps type proportional across all widthsremunits – relative to root font size; scales cleanly when users adjust browser font settingsemunits – relative to parent font size; useful for spacing that should scale with type (padding, margin)vwandvhunits – viewport-relative; use sparingly for large hero text or full-screen sections; avoid for body copy (accessibility issues)
Fluid typography is especially effective for headings and display text. Body copy usually works best with fixed rem sizes adjusted at one or two breakpoints (e.g., 1rem below 768px, 1.125rem above), because ultra-smooth scaling can make paragraph text feel inconsistent. For icons and SVG graphics, use max-width: 100% and height: auto to maintain aspect ratio, or apply clamp() to the container’s width to scale icons proportionally with nearby text.
Real‑World Breakpoint Case Studies
Looking at production sites shows how real design teams choose and implement breakpoints. Warby Parker’s product grid uses three consistent columns on medium screens (around 1024px and up), displaying eyeglass frames in a clean, scannable layout. When the viewport drops below 768px, the grid reflows to a single-column layout built for thumb scrolling on mobile. The breakpoint isn’t arbitrary. It’s the exact width where three columns become too cramped to show product details clearly. The shift is smooth because the grid uses CSS Grid with auto-fill and minmax(), so columns naturally collapse as space disappears.
IBM’s documentation site demonstrates component-level breakpoint behavior. On large screens (1200px and wider), the left navigation sidebar stays visible, anchored to the left edge of the viewport. At medium sizes (roughly 768px to 1199px), the sidebar collapses into a hamburger icon in the top-left corner, freeing up horizontal space for the main content. Below 768px, the layout switches to a single-column mobile view with the hamburger menu and full-width article text. The breakpoints align with user behavior: desktop users scan the full nav tree, while mobile users tap into specific sections on demand.
Airbnb’s search-results page offers a more complex example. On large desktop screens (1440px and up), the page displays a map panel on the right and a scrollable list of properties on the left, each occupying roughly half the viewport. At tablet widths (768px to 1024px), the layout defaults to the list view, and the map is hidden behind a “Show map” button that overlays the list when tapped. Below 768px, the page is list-only, and tapping a property card opens the map in a full-screen modal. Each breakpoint corresponds to a meaningful shift in how users interact with the search interface: desktop users compare map and list simultaneously, tablet users toggle between them, and mobile users focus on one view at a time.
Key patterns from these real-world examples:
- Navigation changes – sidebar visible on large screens, collapses to hamburger icon below around 1024px (IBM pattern)
- Column reflow – multi-column grids collapse to fewer columns or single-column stacks at tablet and mobile widths (Warby Parker pattern)
- Content prioritization – secondary content (maps, filters, sidebars) hidden or toggled on smaller screens to preserve primary content (Airbnb pattern)
- Touch-optimized interactions – buttons and tap targets increase in size below 640px to accommodate finger input
- Image aspect ratios – hero images switch from wide landscape crops to taller portrait crops on mobile to fit small screens without excessive scrolling
- Flexible grids – CSS Grid with
auto-fill,auto-fit, andminmax()reduces the need for explicit breakpoints by letting content reflow naturally (used across all three examples)
These case studies show that breakpoints aren’t just about device widths. They’re about adapting the interaction model to match how users actually engage with content on different screen sizes.
Testing Breakpoints Across Devices and Tools
Testing your breakpoints means verifying that layout, typography, images, and interactive elements behave correctly at every target width and on real hardware. Browser DevTools provide the fastest initial testing loop. Chrome DevTools Device Mode and Firefox Responsive Design Mode both let you enter custom viewport dimensions, toggle device orientation, and simulate touch input. Start by testing your defined breakpoints one by one: set the viewport to exactly 768px, then 767px, to confirm the media query triggers correctly. Then drag the viewport slider slowly between breakpoints to catch any awkward intermediate widths where content might overflow or wrap poorly.
Chrome DevTools includes presets for common devices: iPhone SE (375px), iPad (768px), generic laptop (1200px), and widescreen (1920px). These align with the standard breakpoint tiers. Use these presets as quick smoke tests, but don’t stop there. Your analytics might show heavy traffic from devices at 393px (Pixel 5), 414px (iPhone Pro Max), or 820px (iPad Air). Add those widths to your test checklist. In DevTools, enable “Show media queries” in the Device Mode toolbar to see a visual ruler of your breakpoints overlaid on the viewport. This makes it easy to spot gaps or overlaps in your media-query ranges.
Testing checklist for responsive breakpoints:
- Test each defined breakpoint exactly – load the page at 768px, 767px, 1024px, 1023px to confirm media queries trigger at the correct pixel
- Drag-resize between breakpoints – slowly drag from 320px to 1920px, watching for content overflow, image distortion, or layout shifts at unexpected widths
- Use DevTools device presets – test iPhone SE (375px), iPad (768px), laptop (1200px), widescreen (1920px) as baseline coverage
- Test real devices when possible – borrow phones, tablets, and laptops from your team or use cloud device farms (BrowserStack, Sauce Labs) to verify pixel density, touch input, and performance on actual hardware
- Check orientation changes – rotate tablet and phone viewports from portrait to landscape; confirm orientation-based media queries (if any) apply correctly
Real-device testing catches issues DevTools can’t simulate: high-DPI rendering differences, touch-input precision, browser-specific quirks (Safari’s address bar height on iOS), and performance bottlenecks on lower-end hardware. Cloud testing services let you run automated screenshot comparisons across dozens of device/browser combinations, but manual testing on a few representative devices is faster for spotting usability problems. If you’re building a public-facing site, test on at least one iPhone, one Android phone, one iPad, and one laptop before shipping.
Key Points to Remember When Working With Breakpoints
Effective breakpoint strategy starts with naming and documentation. Use a consistent naming convention: T-shirt sizes (xs, sm, md, lg, xl) or descriptive labels (mobile, tablet, desktop) so your team knows which breakpoint applies where. Store breakpoint values in CSS custom properties or Sass variables so you can adjust them globally without hunting through stylesheets. For example, define --breakpoint-tablet: 768px; at the root, then reference it in media queries: @media (min-width: var(--breakpoint-tablet)). This keeps your breakpoints adaptable if you later discover your audience skews toward larger phones and you need to shift the mobile/tablet boundary from 768px to 820px.
Limit your breakpoint count to the minimum set that meaningfully changes layout. Adding a breakpoint at every 100px increment creates maintenance burden and increases the chance of layout bugs. Start with two or three breakpoints (e.g., 640px, 1024px), then add more only when content demonstrably breaks at an intermediate width. Involve your development team when defining breakpoints. They implement the media queries and know which CSS properties are expensive to override. If you’re working on an existing site, audit the current breakpoints in the codebase before designing new features. Mismatched breakpoints between old and new components create inconsistent user experiences and double the testing surface.
Quick reference rules for breakpoint decisions:
- Name breakpoints semantically – use T-shirt sizing (xs, sm, md, lg, xl) or role-based labels (mobile, tablet, desktop) for clarity
- Store values in CSS variables – define breakpoints once (
--breakpoint-md: 768px;) and reference them in media queries for easy global updates - Limit breakpoint count – use only the breakpoints where layout or content meaningfully changes; two to four breakpoints cover most projects
- Test content-driven breakpoints – resize your layout in DevTools to find exact widths where design breaks, then set breakpoints at those values
- Document breakpoints in design systems – maintain a single source of truth (design tokens, style guide) so designers and developers reference the same values
These habits keep breakpoints maintainable as your project grows and ensure your responsive design remains predictable across the team.
Final Words
You mapped where layouts shift, added media queries, and picked common widths like 320, 768, and 1200px. You wrote a few quick tests in DevTools and saw how components respond.
We covered mechanics (min/max queries), mobile-first vs desktop-first, framework defaults, container queries, fluid type, testing, and how to pick content‑driven breakpoints.
Use this as a cheat sheet when you test and iterate on breakpoints for responsive design. Keep it simple, measure where things break, and tweak. You’re ready — your pages will hold up.
FAQ
Q: What are breakpoints in responsive design?
A: Breakpoints in responsive design are specific viewport widths where styles change so layouts stay usable, typically implemented with CSS media queries to apply different rule sets at those widths.
Q: What are common breakpoint values to use?
A: Common breakpoint values to use include 320, 360, 480, 640, 768, 1024, 1200, 1280, 1440, 1536, and 1600+ pixels; most projects only need 2–3 key breakpoints.
Q: How do you write a CSS media query for breakpoints?
A: A CSS media query for breakpoints uses min-width or max-width, for example @media (min-width: 768px) { /* styles */ }, which applies styles when the viewport meets that width.
Q: When should I use min-width vs max-width queries?
A: Use min-width when you want mobile-first styles that add rules as the viewport grows, and use max-width for desktop-first setups that remove or change styles as viewports shrink.
Q: What is the mobile-first versus desktop-first breakpoint strategy?
A: Mobile-first starts with small-screen base styles and uses min-width to add rules as screens grow, while desktop-first starts large and uses max-width to adapt downward; mobile-first is generally recommended.
Q: How many breakpoints should I use in a project?
A: Use as few breakpoints as needed—typically 2–3—placing them where content or layout actually breaks to keep CSS simpler and testing faster.
Q: How do I choose custom, content-driven breakpoints?
A: Choose custom breakpoints by resizing in DevTools until text or components visually break, then set a breakpoint just before that width to fix the layout.
Q: What are container queries and when should I use them?
A: Container queries adapt component styles based on their container size rather than the viewport; use them for modular components like cards, modals, nav items, and media blocks.
Q: How should I handle responsive typography and fluid scaling?
A: Handle responsive typography with clamp(), em/rem units, and fluid formulas to scale smoothly between breakpoints; keep SVGs responsive with viewBox and relative sizing.
Q: What are Bootstrap and Tailwind default breakpoint values?
A: Bootstrap defaults: sm 576px, md 768px, lg 992px, xl 1200px, xxl 1400px. Tailwind defaults: sm 640px, md 768px, lg 1024px, xl 1280px, 2xl 1536px.
Q: How do I test breakpoints across devices and tools?
A: Test breakpoints using Chrome DevTools device presets, manual resizing, and cloud device testing; verify layout, touch targets, and performance at each breakpoint and density.
Q: What are the key rules to remember when working with breakpoints?
A: Remember to name breakpoints consistently, store values in CSS variables, limit breakpoints to meaningful changes, prefer content-driven points, and always test on real devices.
